How to Screen Record Windows 11

How to Screen Record Windows 11
Table of Contents
You’ve come to the right place if you use Windows 11 and need to record your screen activities. Screen recording can be helpful in various scenarios, such as creating educational videos or documenting a problem you encounter while using the computer. In this article, we’ll guide you through screen recording using Windows 11’s built-in tools step-by-step and provide tips and suggestions to ensure a smooth and successful experience.
Related: Change Mouse Sensitivity Windows 11
How to Screen Record Windows 11
This article offers a comprehensive guide on recording a screen in Windows 11, which can serve as an invaluable resource for those looking to share explainer videos, create educational content, or preserve significant screen moments. Commences by shedding light on the significance of screen recording in Windows 11 and highlighting its potential applications, such as generating educational videos, capturing gaming sessions, or even troubleshooting technical issues. Furthermore, the article provides a step-by-step guide on utilizing Windows 11’s built-in tools to facilitate screen recording.
Why should you record the screen in Windows 11?
Screen recording is a valuable and powerful tool for Windows 11 users in many situations. There are several reasons why screen recording may be necessary👇.
- Create educational content: Screen recording can help you create effective educational content, whether you’re a coach, teacher, or someone explaining specific topics. You can record actions on the screen and define the steps live to make the explanation more understandable.
- Document bugs and fix problems: When encountering an issue with the system or a specific program, you can record the screen while the problem occurs to document it and share it with customer support or developers. This can help speed up the bug-fixing process.
- Clarify procedures: If you’re offering a remote training or coaching course, you can use screen recording to explain systems and processes better. The recording shows the details clearly and makes the explanation more powerful.
- Record gaming sessions: Screen recording is essential for gamers, as it can be used to record gameplay clips to share across live streaming platforms or to create content for your YouTube channel.
- Document digital presentations and presentations: If you do digital presentations or presentations, you can use screen recording to record the presentations and content you share with your audience.
Screen recording using Snipping Tool
Screen recording has become an indispensable tool for numerous users, serving various purposes such as documenting computer activities, creating educational content, or providing clarity in operations. In this regard, the Snipping Tool is an effective and user-friendly tool for screen recording in Windows 11. As one of the built-in applications in Windows 11, it boasts a simple interface and powerful features for direct screen recording. This tool enables users to capture screenshots to illustrate specific points or record short videos. In the following paragraphs, we will explore using the Snipping Tool to achieve screen recordings in uncomplicated steps. We will explore the different settings available within the tool, the precise selection of areas to record, and the options that enhance the recording quality.
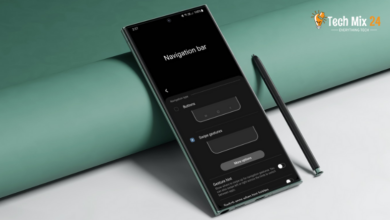
First, go to Search, then find Snipping Tool. Then click Open.

Once you click on the snipping device, the tool will open in a floating window. Click on the video recording icon at the top left of the tool window and then click New.

After clicking on New, the tool will open and ask you to select a part of the screen to be recorded. Select the partition you want to register to your computer and click Start.

After recording the video, a red button appears in the tool. After starting the Recording, I cannot take a screenshot of it because I take screenshots using the same tools.
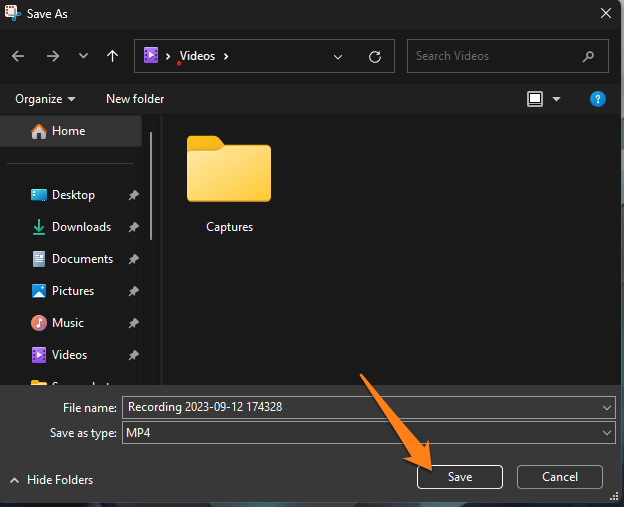
When the Recording is finished, the tool will open a window where the recorded video is located. Click on the three dots at the top right of the screen, then click “Save.”

After that, you will be asked to select the folder to save the file. Select the folder and click Save.
That’s all there is to it, of course. Now, you will be able to record your computer screen with ease.
Snipping Tool is a powerful and user-friendly technology that can be a valuable asset for individuals seeking a simple way to capture their screen without additional software. This tool allows users to quickly and effectively create screen recordings for various purposes, such as educational, demonstrative, or documentation. The intuitive interface of Snipping Tool ensures that users can seamlessly integrate it into their workflow, providing them with a versatile and efficient means of screen recording.
Xbox screen recording Windows 11
In this section, we’ll take you through a comprehensive tour of how to record your Xbox screen using Windows 11. We’ll walk you through the simple steps and tools available to enable you to capture incredible footage of your gameplay, whether you want to record your best winning moments or share your gaming experiences with… Gaming community.
First, use Windows+G on your keyboard. A floating Xbox widget will open.
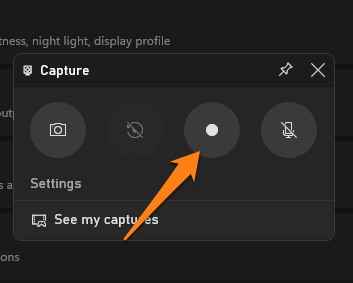
After the tool appears, click on the camera icon in the small floating menu at the top of the screen.
After that, a new small window will appear containing the registration commands.
Click on the Start Recording button. (But I want to tell you that the tool does not work on the desktop. Just open your game or anything else.)
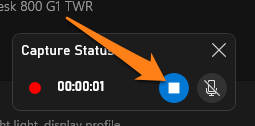
Recording will start immediately with a small window appearing. After Recording, click the Finish button in the small screen recording window.
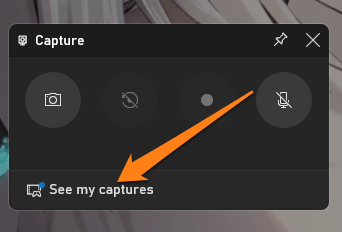
Next, enter the command Windows+G again and click See My Captures to view the recorded video.
After that, you can delete the video or go to the file location where it was saved.


The capability to record screens on Windows 11 by utilizing the Xbox feature has added significant value to the user experience in the domains of gaming and entertainment. With the versatility and power of Xbox, users can leverage the screen recording functionality to document special gameplay moments or create exclusive content to share with the broader gaming community. The feature’s convenience and effective integration with the overall Xbox Services ecosystem on Windows 11 allows users to express their skills and experiences directly and engagingly. Overall, this feature has proven to be an essential addition that enhances the user experience on Windows 11.
Linked: How to activate Truecaller on iPhone
What is Snipping Tool and Xbox?
There may be some confusion between two distinct concepts, namely the “Snipping Tool” and “Xbox.” Allow me to explain each of them in detail.
The Snipping Tool is a built-in Windows tool that facilitates the capture of screenshots to document or illustrate screen content. It allows users to select a specific type of shot, such as a rectangular or freestyle cut, and capture the desired area. The Snipping Tool is available in various versions of Windows.
On the other hand, Xbox is a brand owned by Microsoft Corporation, which specializes in gaming devices and services. Xbox provides a range of gaming consoles, including the Xbox Series X, and offers the Xbox Game Pass subscription service, which grants subscribers monthly access to an extensive library of games.
conclusion
Screen recording in Windows 11 is a simple thing that can significantly impact how you use your computer. With built-in tools like the Xbox Game Bar, Snipping Tool, and modern OS features, you can now easily record your screen and share what you register with the world.
So, try these steps and start recording your favorite moments on your Windows 11 screen. Use these recordings to create educational content, document issues, share gaming experiences, or for any purpose.
Goodbye.