How to Clear Cache on Windows 11
How to Clear Cache on Windows 11
Table of Contents
Clearing the cache on Windows 11 is a crucial aspect of maintaining the optimal performance of your system. Caching is a technique that stores temporary data to facilitate faster access to frequently used files and programs. However, with time, these temporary files can accumulate and occupy significant hard drive space, thus negatively impacting system performance. As such, this article provides a comprehensive guide on how to clear the cache on Windows 11, ensuring that your system remains efficient and reliable.
How to Clear Cache on Windows 11
Clearing the cache on Windows 11 is a crucial step in maintaining the optimal performance of your computer. The cache stores temporary files and data that can enhance the speed of web pages and applications. However, over time, this data may accumulate and impact the device’s performance negatively. In this article, we will walk you through clearing the cache on Windows 11, ensuring that the device continues to run smoothly.
Related: How to remove partition Windows 11
Why Should Clean The Cache?
- The use of applications and web browsers leads to the creation of temporary files on the computer’s hard disk, which enhances data access speed. However, with time, these files accumulate and hinder system performance. Clearing the cache can significantly improve system responsiveness, accelerating the launch of applications and programs.
- Temporary files consume significant space on the hard drive. Regularly clearing these files can help free up storage space, enabling the Storage of more files and other data, thus avoiding the problem of storage space limitations that can negatively affect system performance.
- Some temporary files contain sensitive data related to web browsing and application usage, which can compromise privacy. Regularly clearing these files can help maintain confidentiality and prevent unauthorized access to data.
- Corrupted temporary files can cause system malfunction and instability. By clearing these files, some system performance issues can be corrected, thus enhancing system stability and overall performance.
Clear cache using Disk Cleanup
Disk Cleanup is an effective solution for reducing the cache load on your computer and improving its overall performance. This tool carefully analyzes your computer’s storage space and allows you to delete unnecessary files and data, including cache. In the following paragraph, we will provide you with instructions on how to use the Disk Cleanup tool to clear the cache and eliminate redundant files that are occupying storage space on Windows 11.
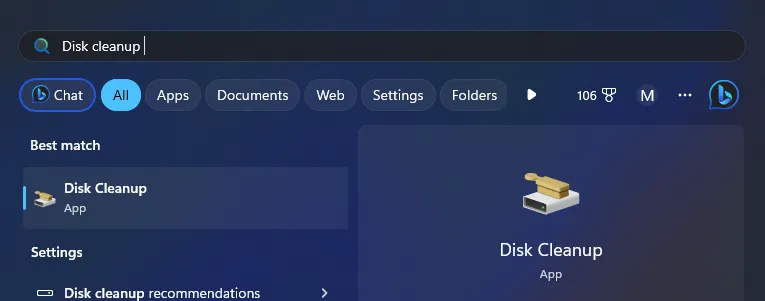
1. First, go to search and then search for Disk Cleanup.
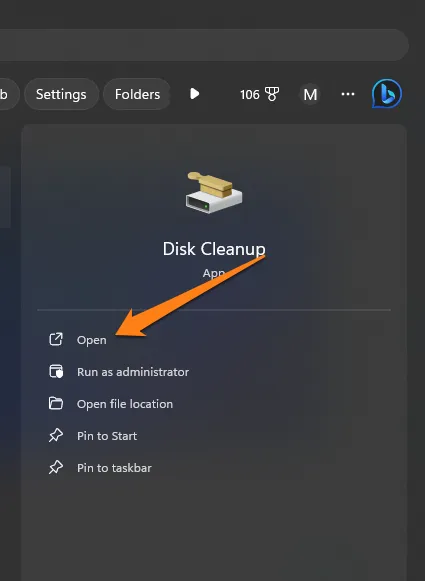
2. Now click Open below.
3. A floating window will appear. Select C and then click OK.
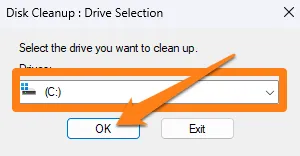
4. After opening the tool, Click on Clean up system files.
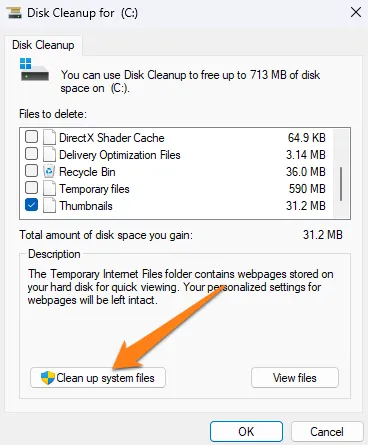
5. Select the files you want to clean, then click OK at the bottom.
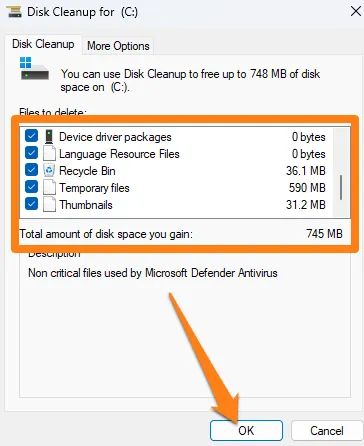
After clicking OK, the selected files will be deleted, and that’s it, of course.
Utilizing Disk Cleanup can enhance the performance of your computer, providing you with additional storage capacity. This tool is designed to assist you in eradicating cache issues, whether you aim to hasten system operation or free up space to store essential documents. By following the straightforward steps outlined in this paragraph, you can experience an immediate improvement in your computer’s performance. e improvement in your computer’s performance.
Clear Individual App Files
Sometimes, a need arises to clear individual app files in Windows 11 for various reasons, such as optimizing app performance or freeing up storage space. In the following paragraph, we will explore clearing app files individually without affecting the rest of the operating system or other apps. We will provide you with a concise set of easy-to-follow steps to execute this process effectively.to manage this process effectively.
1. First, go to settings.
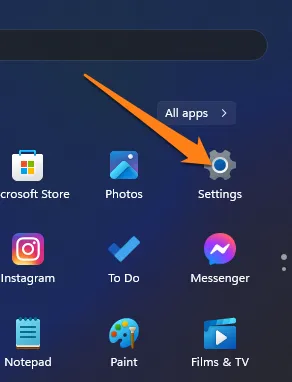
2. After that, click on Apps.
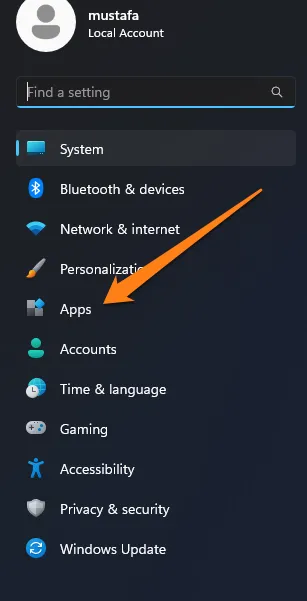
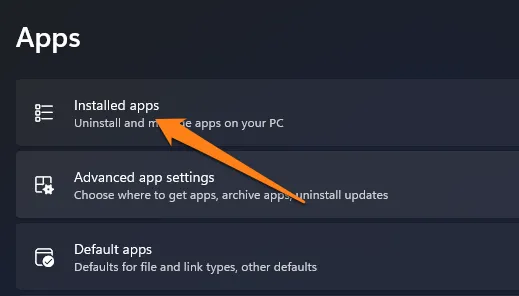
3. After that, click on installed apps.
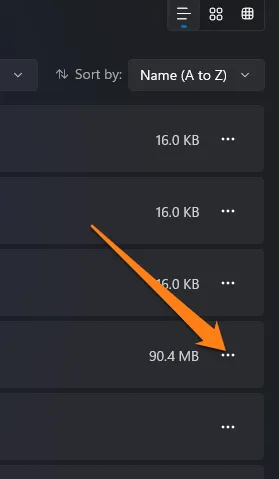
4. Now click on the three dots next to the app whose cache you want to delete.
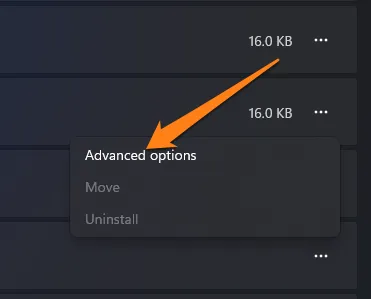
5. After that, click on Advanced options in the small menu.
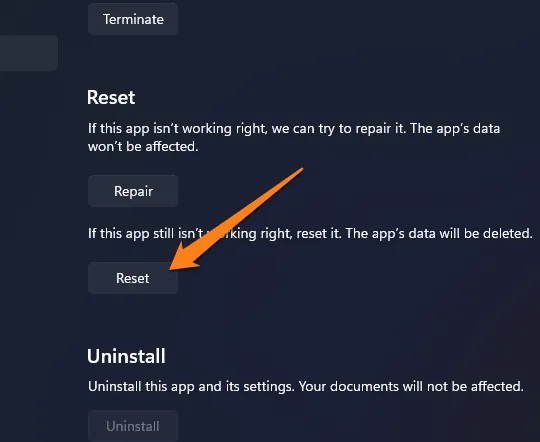
6. Scroll down and click Reset.
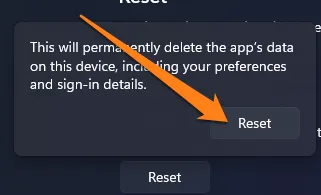
7. After that, click Reset again.
This is all; of course, you can repeat this method on all apps whose cache you want to delete.
Following these straightforward steps, you can quickly and accurately delete individual application files on your Windows 11 operating system. The performance of the respective apps will improve, and you will save valuable storage space, leading to a more customized experience with the operating system and ensuring that your computer runs at maximum efficiency.
Clear Cache Using Windows 11 Settings
Clearing the cache is a crucial task to enhance the performance of your Windows 11 operating system while freeing up storage space. Fortunately, Windows 11 Settings provides an easy-to-use interface to clear cache files, ensuring your system remains in optimal condition. In this paragraph, we will guide you through clearing the cache using Windows 11 Settings, enabling you to maintain your system’s performance and functionality.
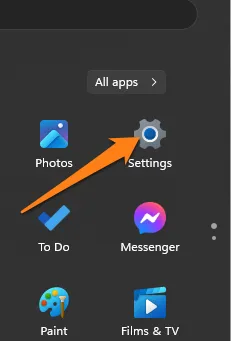
1. First, go to settings.
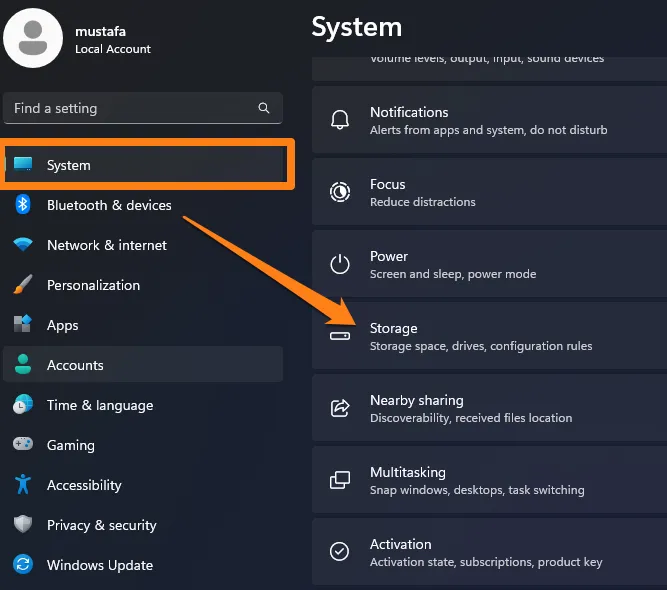
2. In the System section, after going to Settings, click on Storage.
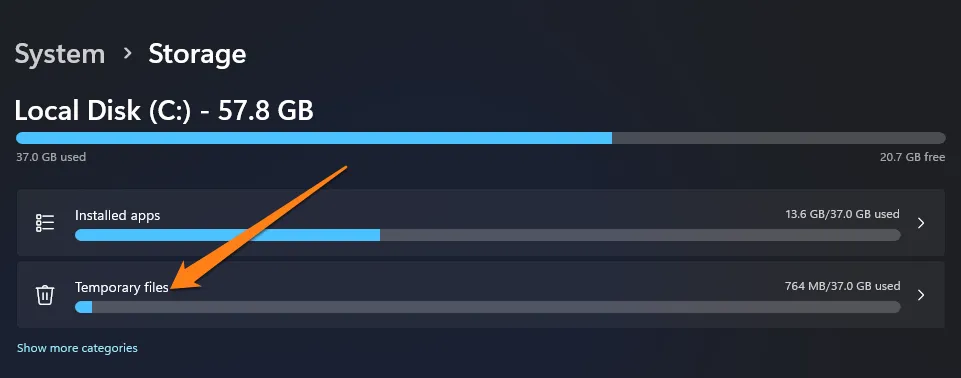
3. After that, click on Temporary Files.
4. Now activate the box next to the files you want to delete, then click on Remove files.
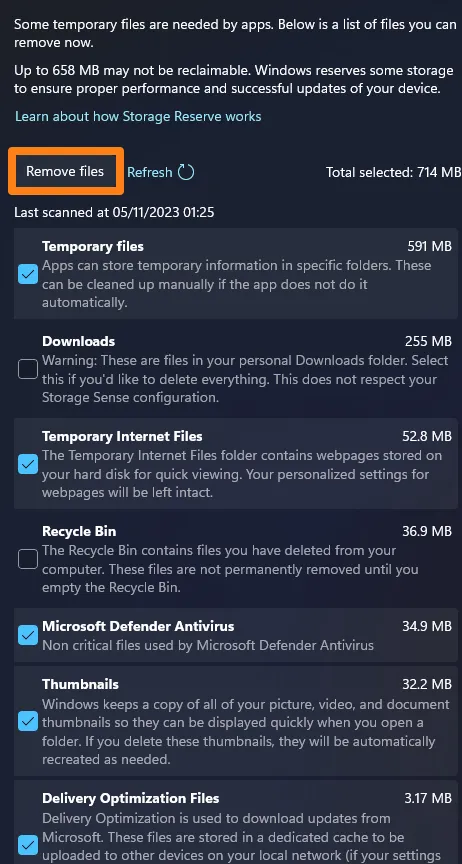
By following simple steps, you can now effortlessly clear the cache using Windows 11 system settings. Select the option best suits your requirement and click ‘Remove Files.’ This uncomplicated action will enhance your computer’s performance by freeing up storage space, ensuring a smoother and more efficient system experience.
Clear Location History
In today’s era of cutting-edge technology, operating systems can record location data through smart devices and apps. The latest version of Windows, Windows 11, is also equipped with the capability to track your location based on your interactions with various apps and services. Suppose you seek a way to ensure your privacy and eliminate any traces of location history. In that case, this paragraph will guide you on how to securely and efficiently clear your location history information in Windows 11.
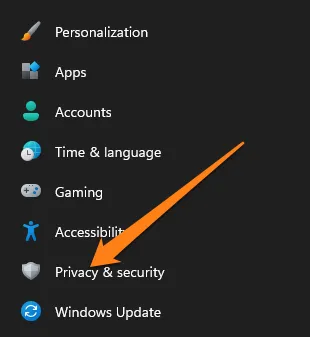
1. First, go to Settings, then click on Privacy & security.
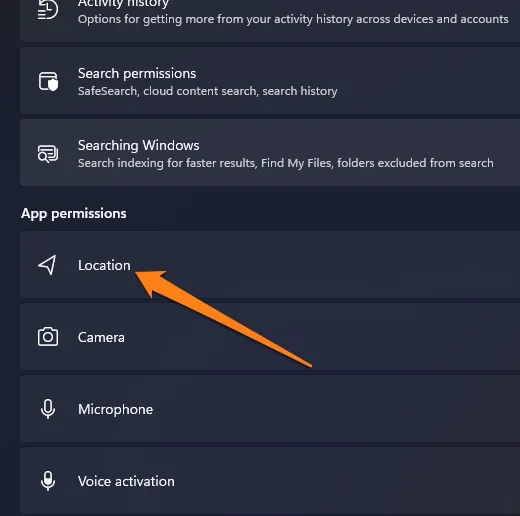
2. After that, scroll down and click on Location.
3. Now click on Clear in the Location history option.
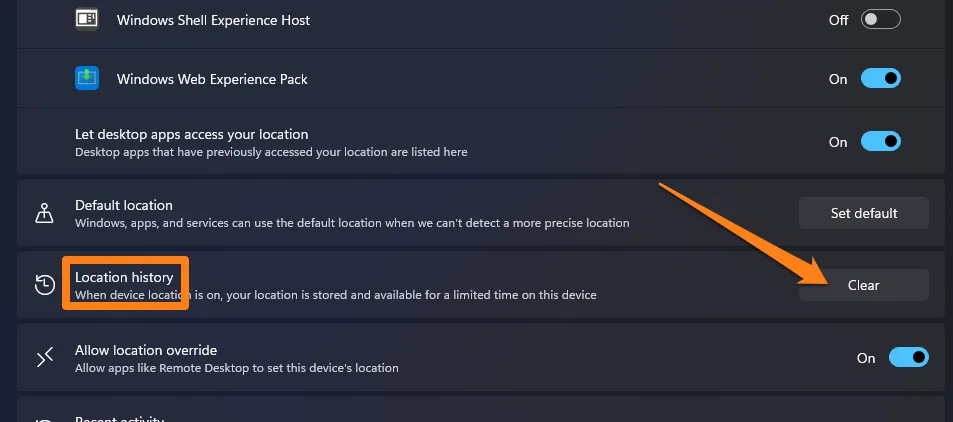
By carefully following the steps and clicking the “Clear” option, you can regain control of your location information and protect your data from being accessed by unauthorized parties. This proactive measure is an essential aspect of maintaining your privacy and security when using Windows 11. We hope this section provides you with the peace of mind and knowledge to protect your location and personal information.
Automatically Remove Temporary Files
Properly managing temporary files is crucial for optimal computer system performance. Accumulation of temporary files over time can consume considerable disk space, leading to reduced system efficiency. Fortunately, Windows 11 provides an automated feature to remove these files, which we will discuss in this paragraph. We will outline the steps to configure Windows 11 to automatically delete temporary files, enhancing system performance and freeing up valuable disk space.
1. Go to Settings and then click on Storage.
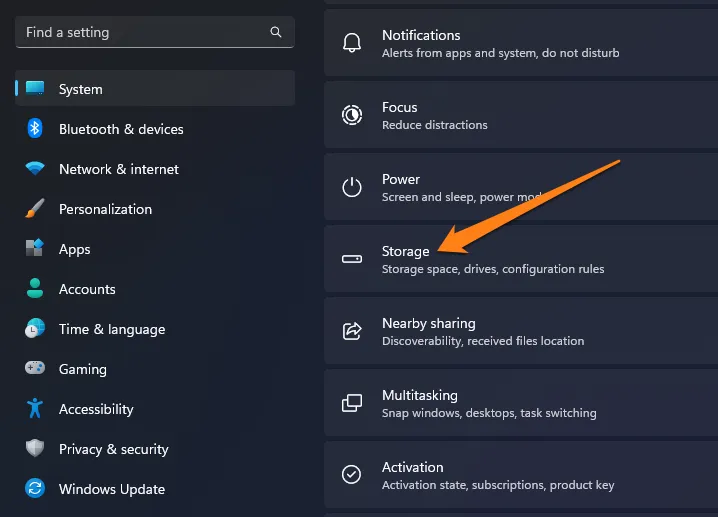
2. Now activate the Storage Sense button.

3. After activating the button, click the Storage Sense option, then configure the cleaning schedules that suit you.
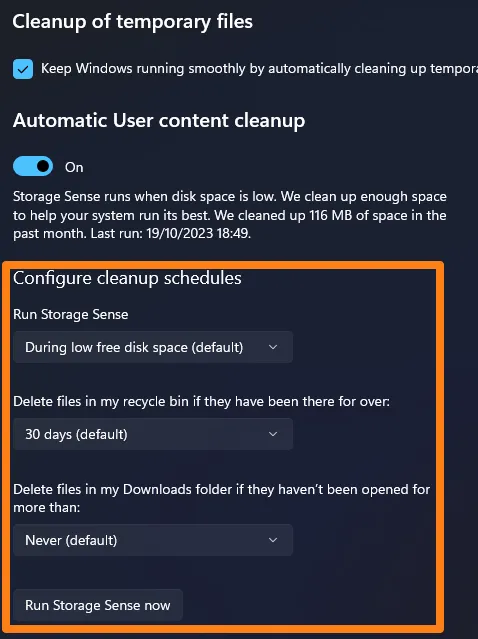
By adhering to these steps and setting up a predetermined schedule to automatically remove temporary files, you can significantly enhance your computer’s functionality without manual management. This configuration will provide a more seamless and efficient Windows 11 experience, requiring minimal effort.
Conclusion
Did you know that clearing the cache on Windows 11 is an easy way to improve your computer’s performance, save storage space, and keep your privacy intact? It only takes a few clicks, and you’ll be on your way to having the best PC experience possible. So, why not make it a habit to do this regularly and keep your Windows 11 system in tip-top shape? Your computer (and your future self!) will thank you for it.


